A healthy and beautiful lawn starts with proper sod installation. Many homeowners want fast results, but they also want to understand exactly what happens during the process before investing in a new lawn. If you are wondering how does sod installation work, understanding each stage can help you make informed decisions and protect your investment.
At Max’s Lawn & Landscaping, professional lawn installation is handled with careful planning, soil preparation, and long-term lawn health in mind. Every step matters, from removing old grass to watering sod correctly after installation.
This guide explains the complete sod installation process from start to finish so you know what to expect.
Why Sod Installation Is Popular
Sod provides an instant lawn compared to growing grass from seed. Instead of waiting months for grass to fill in, sod gives homeowners a green and usable yard almost immediately.
Professional lawn installation also helps reduce common issues such as uneven growth, patchy areas, erosion, and weed invasion. When installed correctly, sod creates a dense and healthy lawn that can improve curb appeal and property value.
Step 1: Initial Lawn Evaluation
The first stage of the sod installation process is evaluating the property. Lawn professionals inspect the condition of the existing grass, soil quality, drainage, sun exposure, and uneven areas before starting the work. This evaluation helps determine the best type of sod and identifies any underlying issues that could affect the health of the new lawn.
Understanding site conditions is important because poor preparation often leads to weak rooting and unhealthy grass later.
Step 2: Removing Existing Grass and Debris
Before new sod can be installed, the old lawn must be removed completely. Dead grass, weeds, rocks, roots, and construction debris are cleared away to create a clean surface for the sod.
If weeds or old grass remain underneath, they can compete with the new sod for water and nutrients. Professional lawn installation teams often use specialized sod-cutting equipment to remove existing turf efficiently and prepare the area properly.
Step 3: Soil Preparation and Soil Grading
One of the most important sod installation steps is preparing the soil correctly. Healthy sod depends on healthy soil conditions.
In some cases, professionals test the soil to check pH levels, nutrient balance, and soil compaction. This helps determine whether compost, fertilizer, or other soil amendments are needed before installation.
Soil grading is another critical part of the process. During soil grading, the surface is leveled and shaped to improve drainage and create a smooth lawn. Proper grading helps prevent standing water, erosion, and drainage issues that can damage sod over time.
Low areas are filled while high spots are reduced to create an even surface. The soil is also loosened to encourage deeper root growth and improve the flow of oxygen, nutrients, and water.
Step 4: Adding Soil Amendments and Fertilizer
After the soil is prepared, nutrients are often added to support healthy sod growth. Compost, topsoil, and starter fertilizer may be incorporated into the soil before installation begins.
Starter fertilizer is especially important because it provides nutrients that help the new sod establish roots more quickly. The goal is to create ideal growing conditions so the sod can root successfully after installation.
Step 5: Measuring and Ordering Sod
Accurate measurements are essential during the sod installation process. Professionals calculate the square footage carefully to ensure complete coverage and minimize waste.
The type of sod selected depends on climate conditions, sunlight exposure, foot traffic, and maintenance preferences. Fresh sod should always be installed quickly after delivery to maintain moisture and quality.
Step 6: Laying the Sod
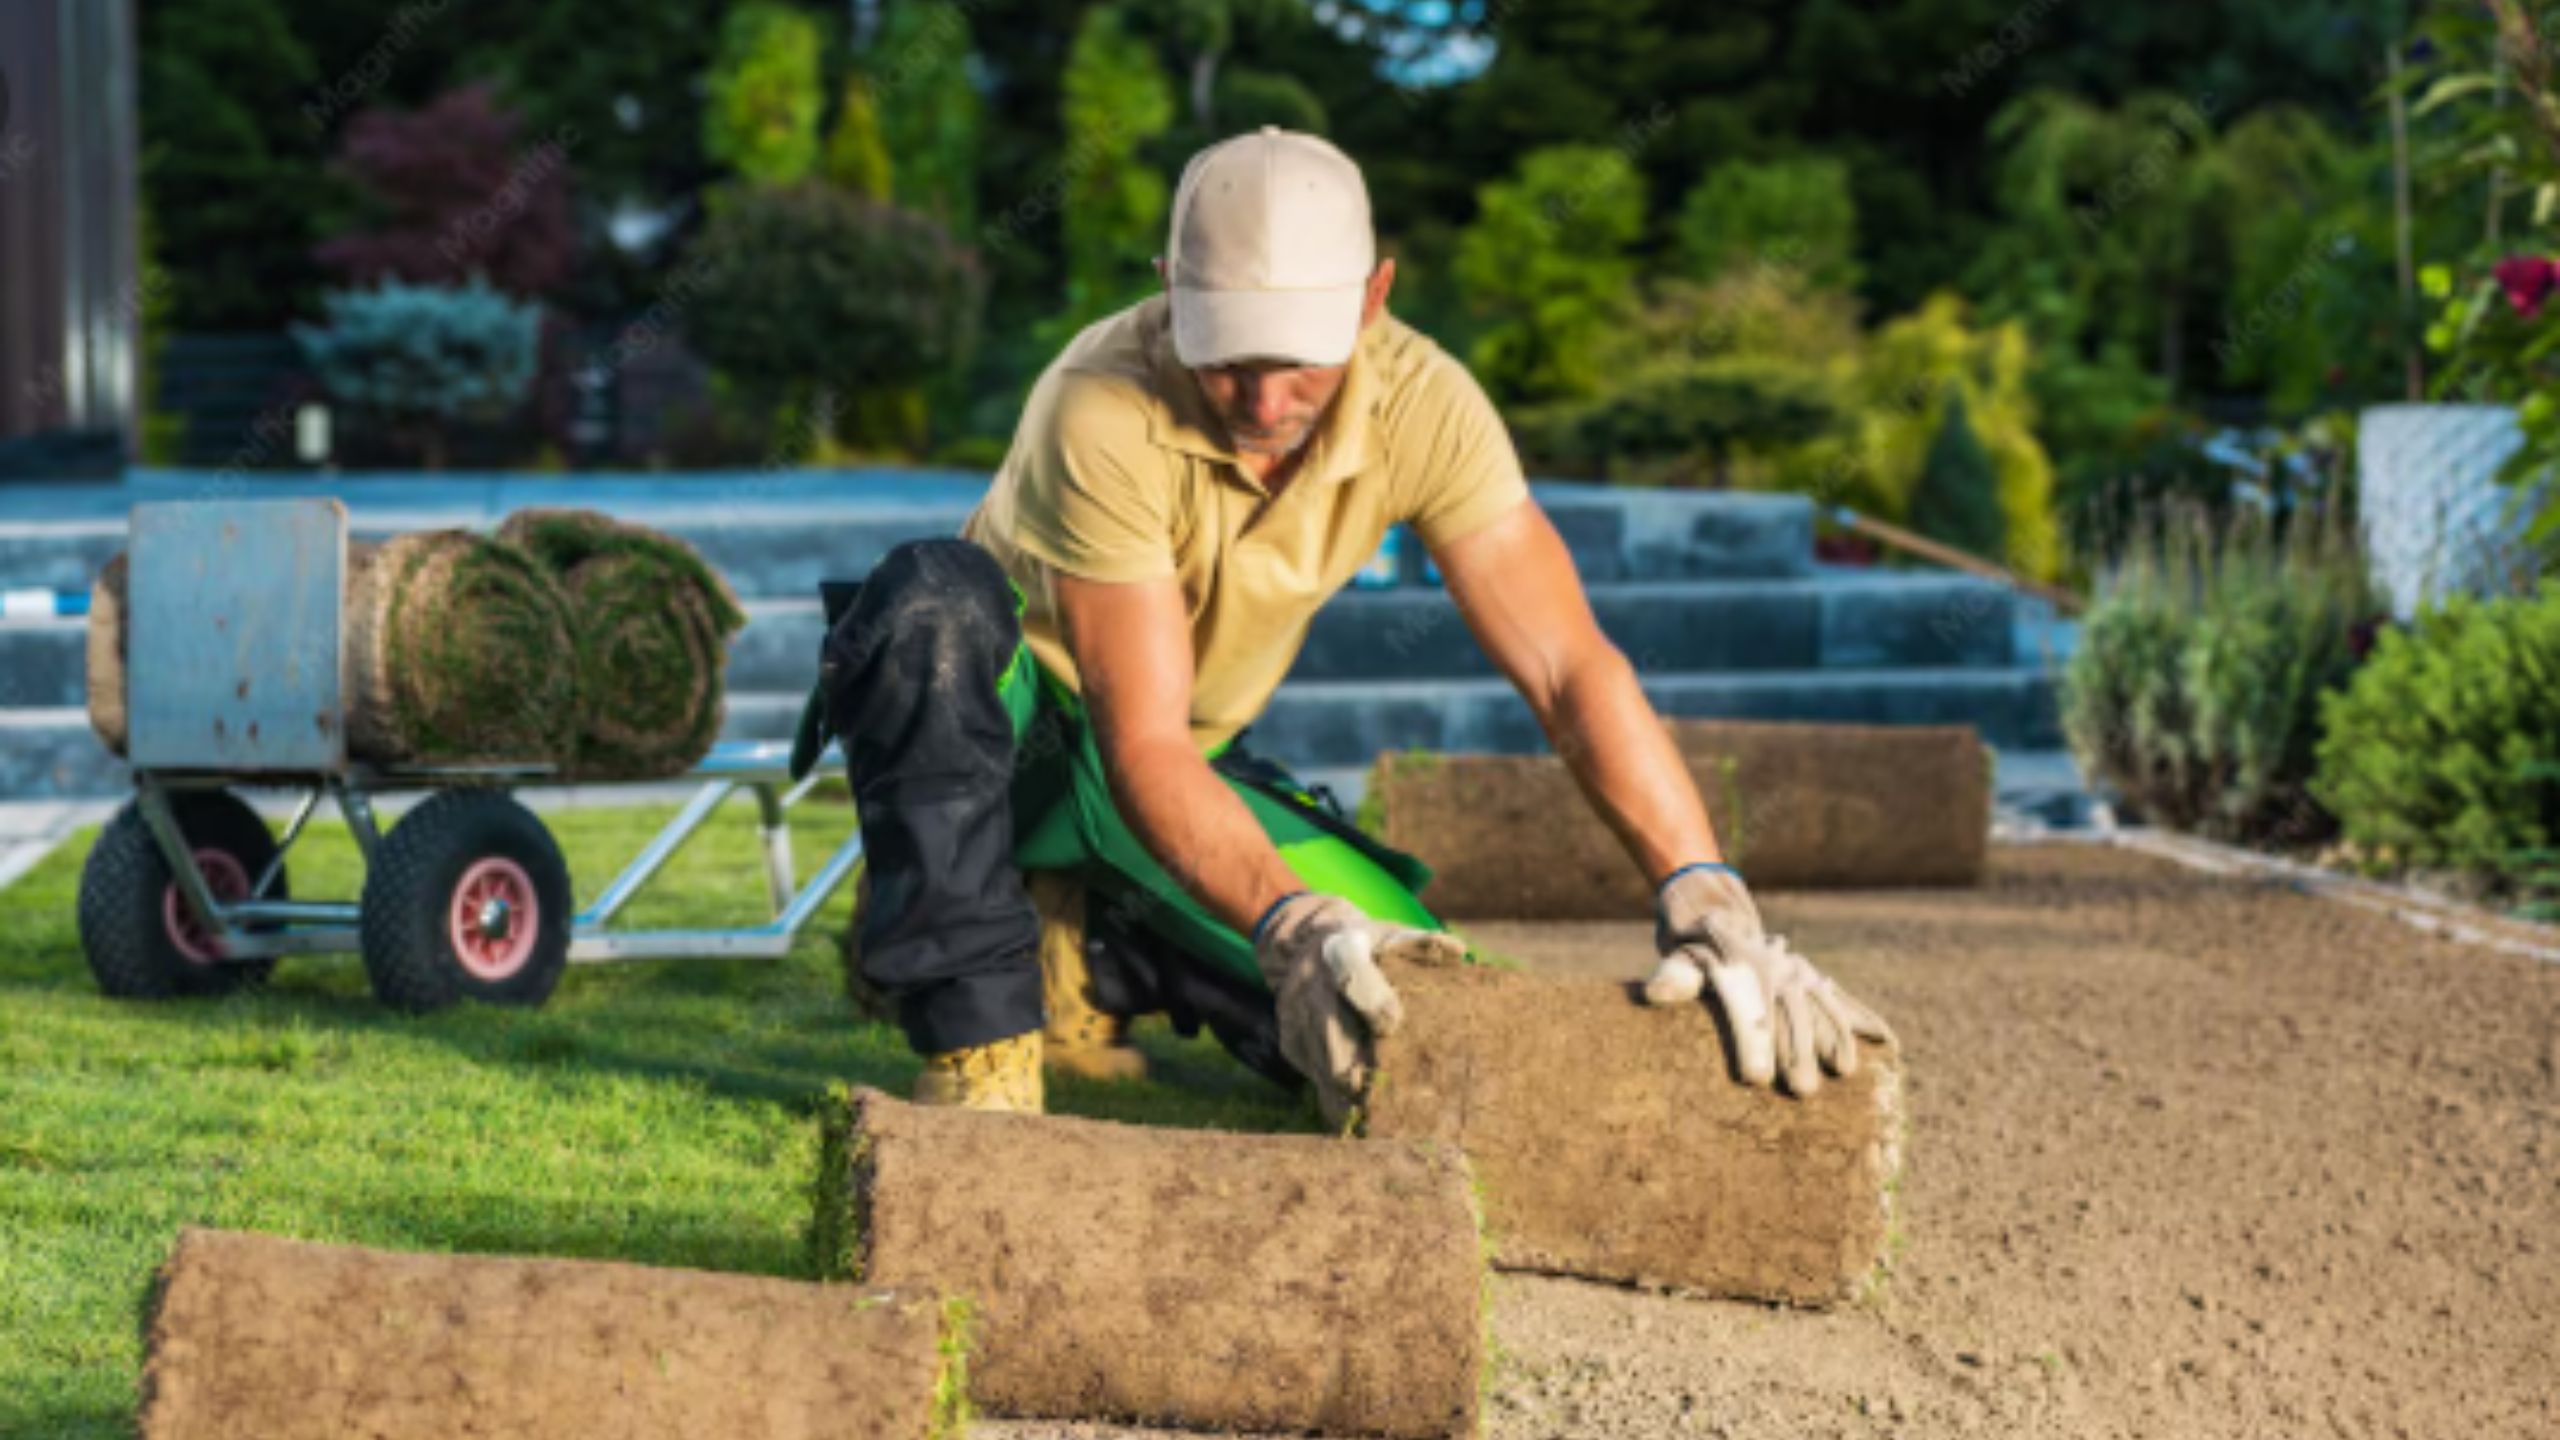
The actual installation process begins once the soil is fully prepared. Sod is carefully laid in rows across the yard using techniques that promote healthy establishment.
Professional lawn installation crews place the sod in a staggered pattern similar to brickwork. This method helps reduce visible seams and creates a more natural appearance. Each piece is installed tightly against the next without overlapping or leaving gaps.
The sod is trimmed neatly around sidewalks, flower beds, and driveways for a clean finish. After installation, lawn rollers may be used to press the sod firmly against the soil and remove air pockets that could interfere with rooting.
These sod installation steps are important because proper contact between the sod and soil encourages faster root establishment.
Step 7: Watering Sod Immediately After Installation
Watering sod properly is one of the most critical parts of the entire process. Newly installed sod can dry out quickly if it is not watered immediately.
Most professional installers begin watering the lawn as soon as the sod is laid. During the first few weeks, the sod must remain consistently moist to encourage root development.
Watering sod correctly helps prevent shrinking, browning, dry patches, and root failure. The watering schedule depends on weather conditions, soil type, and temperature, but the lawn generally requires frequent watering during the establishment period.
Healthy sod should feel cool and moist while maintaining a consistent green appearance. If the edges begin curling or turning brown, the lawn may require additional moisture.
Step 8: Sod Rooting Time and Lawn Establishment
One of the most common questions homeowners ask is about sod rooting time. Although sod looks complete immediately after installation, the roots still need time to grow into the soil beneath.
During the first couple of weeks, shallow roots begin attaching to the prepared soil. Homeowners should avoid excessive foot traffic during this stage because walking on fresh sod can disrupt root development.
Full sod rooting time generally takes between two and six weeks depending on weather conditions, watering consistency, and soil quality. Cooler temperatures or extreme heat may extend the rooting process.
A simple way to test root development is by gently lifting one corner of the sod. If the sod resists lifting, the roots are beginning to establish successfully.
Step 9: First Mowing and Long-Term Lawn Care
The first mowing usually takes place once the grass reaches the appropriate height and the roots are established. Sharp mower blades should always be used to avoid damaging the grass.
Cutting the lawn too short can stress the newly rooted sod, so proper mowing height is important during the early stages of growth.
Long-term lawn care includes consistent watering, seasonal fertilization, weed prevention, and proper mowing practices. Professional lawn installation creates the foundation for a healthy lawn, but ongoing maintenance is necessary to keep the grass thick and vibrant throughout the year.
Common Sod Installation Mistakes
Even high-quality sod can struggle if installation is rushed or handled incorrectly. Poor soil preparation is one of the most common problems because compacted or uneven soil limits root growth.
Incorrect watering can also damage newly installed sod. Too little water causes drying and shrinking, while overwatering may lead to root rot and fungal problems.
Another common issue is allowing heavy foot traffic too soon. Fresh sod needs time to establish strong roots before regular use.
Working with experienced professionals helps reduce these risks and improves the long-term success of the lawn.
Why Professional Lawn Installation Matters
Many homeowners consider installing sod themselves, but professional lawn installation offers several advantages. Experienced crews understand proper soil grading, efficient installation methods, correct watering schedules, and regional grass varieties that perform best in local conditions.
Professionals also complete the process more efficiently while reducing the risk of costly mistakes that may affect the lawn later. Proper installation creates stronger root establishment and healthier long-term growth.
Conclusion
Understanding how does sod installation work helps homeowners feel more confident about investing in a new lawn. Every stage of the process plays an important role, from removing old grass and performing soil grading to watering sod properly and monitoring sod rooting time.
Professional lawn installation ensures the work is completed correctly from start to finish, helping homeowners achieve a healthy and long-lasting lawn with fewer problems in the future.
At Max’s Lawn & Landscaping, careful preparation and expert installation practices help create lawns that remain green, durable, and attractive throughout the seasons.
Frequently Asked Questions
1. How does sod installation work?
Sod installation involves removing the old lawn, preparing the soil, performing soil grading, laying fresh sod, watering it properly, and allowing time for root establishment.
2. How long does sod rooting time take?
Sod rooting time usually takes between two and six weeks depending on weather conditions, soil quality, and watering consistency.
3. Why is soil grading important before sod installation?
Soil grading improves drainage, prevents standing water, reduces erosion, and creates a smooth surface for healthy sod growth.
4. How often should watering sod occur after installation?
New sod often requires frequent watering during the first few weeks to keep the soil consistently moist and support root growth.
5. When can you walk on newly installed sod?
Foot traffic should be minimized for at least two to three weeks or until the sod develops strong root attachment.
6. Is professional lawn installation worth it?
Professional lawn installation helps ensure proper soil preparation, accurate sod placement, and healthier long-term lawn establishment.